Atari Lynx
Portable d'Atari (1989), premier handheld à écran couleur rétroéclairé. Puissant pour l'époque (customs Suzy & Mikey). Points préservation : le recap (ses condos fuient) et l'écran IPS (mod McWill).
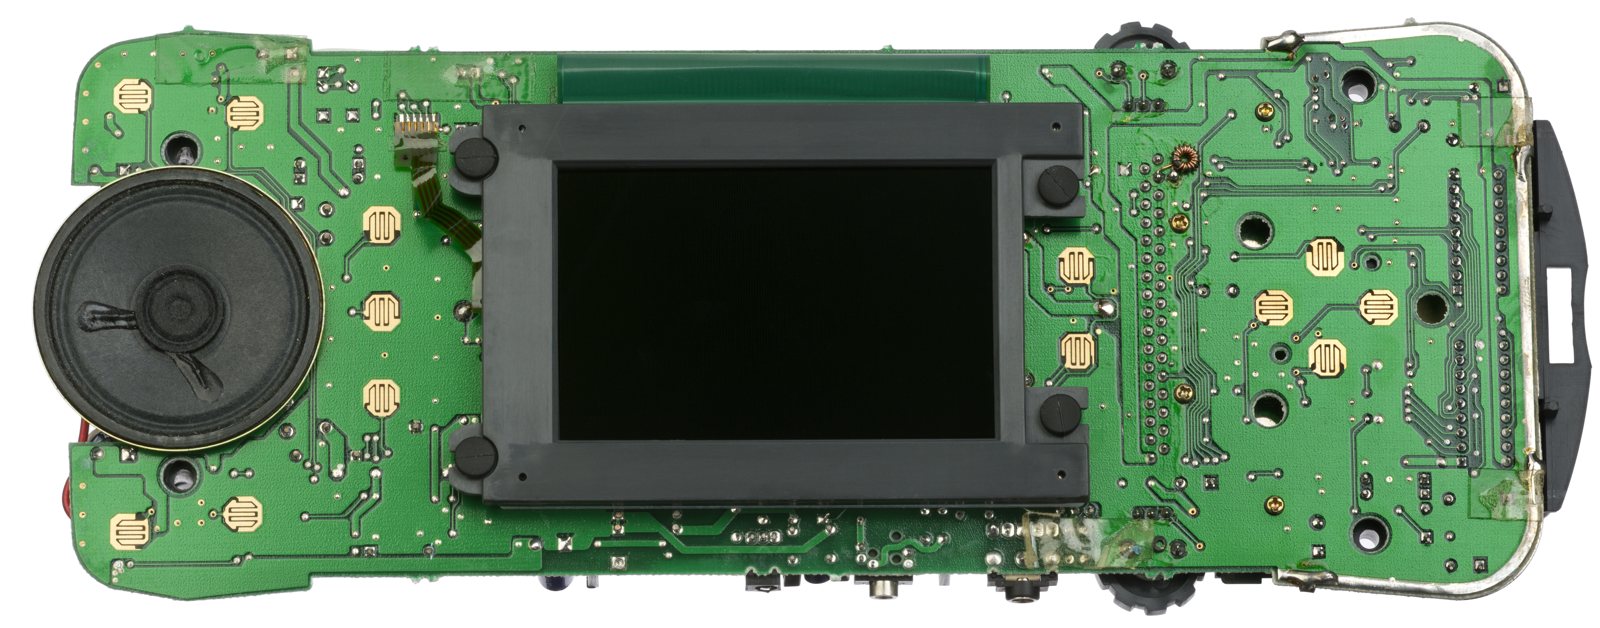
Identification
| Champ | Valeur |
|---|---|
| Fabricant | Atari |
| Sortie | 1989 (Lynx I) · Lynx II (1991) |
| Type | Portable couleur rétroéclairé |
| Média | Cartouche |
Architecture (détail)
| Bloc | Puce | Fréquence | Rôle |
|---|---|---|---|
| CPU | WDC 65C02 | ~4 MHz | |
| Suzy | ASIC custom | blitter (sprites avec scaling/distorsion matériel) + maths (mult/div) — rare pour 1989 | |
| Mikey | ASIC custom | timers, vidéo (LCD 160×102, 4096 couleurs / 16 à l'écran), son 4 voies, I/O | |
| Mémoire | 64 Ko RAM |
Console retournable (l'image peut pivoter à 180° par soft, d'où des jeux jouables gaucher/droitier). Le scaling matériel de Suzy en faisait la portable la plus avancée de son temps — au prix de l'autonomie (6 AA).
Lynx I vs Lynx II & ComLynx
- Lynx I (1989) : grande, port casque mono, pas d'interrupteur d'extinction d'écran.
- Lynx II (1991) : plus compacte et légère, son stéréo au casque, coupure du rétroéclairage pour économiser les piles, coques de meilleure qualité.
- ComLynx : câble de jeu en réseau reliant plusieurs Lynx (jusqu'à ~8-16 joueurs selon le jeu, ex. California Games, Warbirds) — rare pour un handheld de 1989.
⚠️ Recap
Comme beaucoup de handhelds de l'époque, les condensateurs du Lynx vieillissent mal (son, alim, écran) → recap fréquent. Liste par repère CXX : voir Console5.
Pannes fréquentes
| Symptôme | Cause probable | Piste |
|---|---|---|
| Pas de son / alim capricieuse | Condensateurs | Recap |
| Écran sombre / défaillant | Rétroéclairage d'origine | Écran IPS (McWill) |
| Corrosion contacts piles | Piles coulées | Nettoyer contacts |
| Cartouche non lue | Contacts | Nettoyage |
Procédures de démontage pas-à-pas ✅
6 procédures traduites depuis les guides iFixit, avec leur difficulté et leur durée estimée. Le titre d'origine est rappelé sous chaque procédure, pour retrouver le guide et ses photos.
| Procédure | Difficulté | Durée |
|---|---|---|
| The Internal Components of an Atari Lynx | — | — |
| Remplacement du rétroéclairage | 🟠 difficile | non estimée |
| Remplacement des fils du compartiment à piles | 🟠 difficile | 15 à 30 minutes |
| Remplacement des boutons et de la croix directionnelle | 🟢 facile | 15 minutes |
| Remplacement du condensateur C10 | 🟠 difficile | non estimée |
| Remplacement du haut-parleur | 🟠 difficile | non estimée |
The Internal Components of an Atari Lynx
This guide will show you how to disassemble...
- Before disassembling your Atari Lynx, be sure the device is powered off. Remove any game in the console by opening the right latch and sliding the game to the right.
- Remove the four 35 mm Phillips #1 screws at each corner of the backside on the Atari Lynx. Pinch the rear panel with your fingers and lift away from the Atari.
- Remove the battery panel by pinching the sides with your fingers and lifting it away from the Atari. Be sure not to tear any wires attached to battery panel.
- Remove the control panel by pinching the sides with your fingers and lifting it away from the Atari. Be sure not to tear the speaker wire while removing the control panel.
Remplacement du rétroéclairage
Cette procédure demande de l'expérience en soudure et dessoudage. Si tu n'en as pas, forme-toi avant : le rétroéclairage se dessoude, et une piste arrachée sur cette carte ne se répare pas facilement.
- Avant de démonter la Lynx, vérifie qu'elle est éteinte.
- Retire la cartouche en ouvrant le loquet de droite et en la faisant glisser vers la droite.
- Retire les quatre vis cruciformes n° 1 de 35 mm, à chaque angle de la face arrière.
- Pince le panneau arrière entre tes doigts et soulève-le pour le dégager.
- Retire la trappe des piles en pinçant les côtés et en la soulevant.
- Attention à ne pas arracher les fils reliés à la trappe des piles.
- Retire le panneau de commandes en pinçant les côtés et en le soulevant.
- Attention à ne pas arracher le fil du haut-parleur en retirant le panneau de commandes.
- Sors la carte mère.
- Écarte sur les côtés les quatre languettes de caoutchouc qui retiennent l'écran.
- Dévisse les deux vis de 10 mm indiquées avec un tournevis cruciforme n° 0, pour retirer le blindage situé derrière le rétroéclairage.
- Retourne la carte mère et retire le blindage.
- Remets la carte à l'endroit et dessoude les deux composants qui maintiennent le rétroéclairage.
Titre d'origine : « Atari Lynx Backlight Replacement ».
Remplacement des fils du compartiment à piles
Cette procédure demande de l'expérience en soudure et dessoudage.
- Avant de démonter la Lynx, vérifie qu'elle est éteinte.
- Retire la cartouche en ouvrant le loquet de droite et en la faisant glisser vers la droite.
- Retire les quatre vis cruciformes n° 1 de 35 mm, à chaque angle de la face arrière.
- Pince le panneau arrière entre tes doigts et soulève-le pour le dégager.
- Retire la trappe des piles en pinçant les côtés et en la soulevant.
- Attention à ne pas arracher les fils reliés à la trappe des piles.
- Retire le panneau de commandes en pinçant les côtés et en le soulevant.
- Attention à ne pas arracher le fil du haut-parleur en retirant le panneau de commandes.
- Dessoude le fil noir et le fil rouge comme indiqué.
- Dessoude le fil noir comme indiqué.
- Dessoude le fil blanc, puis le fil rouge, comme indiqué.
- Dessoude le fil blanc pour libérer complètement le bloc piles de la console.
Titre d'origine : « Atari Lynx Battery Wire Replacement ».
Remplacement des boutons et de la croix directionnelle
Comment remplacer les boutons, pas à pas.
- Avant de démonter la Lynx, vérifie qu'elle est éteinte.
- Retire la cartouche en ouvrant le loquet de droite et en la faisant glisser vers la droite.
- Retire les quatre vis cruciformes n° 1 de 35 mm, à chaque angle de la face arrière.
- Pince le panneau arrière entre tes doigts et soulève-le pour le dégager.
- Retire la trappe des piles en pinçant les côtés et en la soulevant.
- Attention à ne pas arracher les fils reliés à la trappe des piles.
- Retire le panneau de commandes en pinçant les côtés et en le soulevant.
- Attention à ne pas arracher le fil du haut-parleur en retirant le panneau de commandes.
- Pour remplacer un bouton autre que la croix directionnelle, tire-le vers le haut en pinçant ses côtés, pour le dégager de la face avant.
- Pour déposer la croix directionnelle, retire les trois vis cruciformes n° 0 de 10 mm qui l'entourent.
- Les boutons tombent d'eux-mêmes une fois les vis retirées.
Titre d'origine : « Replacing Atari Lynx Buttons and D-Pad ».
Remplacement du condensateur C10
Cette procédure demande de l'expérience en soudure et dessoudage.
- Avant de démonter la Lynx, vérifie qu'elle est éteinte.
- Retire la cartouche en ouvrant le loquet de droite et en la faisant glisser vers la droite.
- Retire les quatre vis cruciformes n° 1 de 35 mm, à chaque angle de la face arrière.
- Pince le panneau arrière entre tes doigts et soulève-le pour le dégager.
- Retire la trappe des piles en pinçant les côtés et en la soulevant.
- Attention à ne pas arracher les fils reliés à la trappe des piles.
- Retire le panneau de commandes en pinçant les côtés et en le soulevant.
- Attention à ne pas arracher le fil du haut-parleur en retirant le panneau de commandes.
- Dessoude les quatre languettes en aluminium.
- Retire la protection arrière en aluminium pour accéder au condensateur C10.
- Dessoude le condensateur C10.
Titre d'origine : « Replacing an Atari Capacitor ».
Remplacement du haut-parleur
Comment remplacer le haut-parleur de la Lynx. Savoir souder et dessouder est indispensable avant de commencer.
- Avant de démonter la Lynx, vérifie qu'elle est éteinte.
- Retire la cartouche en ouvrant le loquet de droite et en la faisant glisser vers la droite.
- Retire les quatre vis cruciformes n° 1 de 35 mm, à chaque angle de la face arrière.
- Pince le panneau arrière entre tes doigts et soulève-le pour le dégager.
- Retire la trappe des piles en pinçant les côtés et en la soulevant.
- Attention à ne pas arracher les fils reliés à la trappe des piles.
- Retire le panneau de commandes en pinçant les côtés et en le soulevant.
- Attention à ne pas arracher le fil du haut-parleur en retirant le panneau de commandes.
- Sors la carte mère de la console.
- Retourne la carte mère, écran vers le bas.
- Dessoude les deux fils reliés au haut-parleur.
- Soude le haut-parleur neuf, puis remonte en suivant les étapes précédentes dans l'ordre inverse.
Titre d'origine : « Replacing Atari Lynx Speaker ».
Source, licence et portée
Guides iFixit, sous Creative Commons BY-NC-SA — attribution, usage non commercial, partage à l'identique. Le texte est traduit de l'anglais ; le titre d'origine est rappelé sous chaque procédure et les photos d'étapes restent sur iFixit. ⚠️ Ces guides visent le modèle nommé dans le titre : sur une autre révision, la visserie et l'ordre de dépose peuvent différer.
Procédure — console morte, dans l'ordre ✅
Rétroéclairage et batterie
L'inverseur de rétroéclairage porte une haute tension, sous tension, sur une carte qu'on tient en main. Et un accu lithium gonflé ne se perce ni ne se plie — le sortir d'abord et le mettre à l'écart.
Ce que cette procédure ajoute
Un ordre pensé pour une console, pas pour une carte arcade : ce qui tue ces machines n'est presque jamais le CPU. C'est, dans l'ordre réel, l'alimentation, les condensateurs, le lecteur ou le slot de cartouche, et la logique seulement ensuite. → Diagnostic PCB
1. L'alimentation. Deux cas selon la machine. Bloc externe : ⚠️ lire le marquage sur la machine, à côté de la prise, et vérifier l'adaptateur en face — tension et polarité. Une machine à centre négatif alimentée en centre positif y laisse son fusible, parfois son régulateur ; ne pas se fier à l'étiquette d'un bloc tiers ni à un embout universel. Alimentation interne (la machine se branche directement au secteur) : le secteur est dans le boîtier. Débrancher, attendre, et vérifier que les gros condensateurs sont déchargés avant de toucher la carte. Dans les deux cas, mesurer en charge : un bloc fatigué tient sa tension jusqu'à ce qu'on lui demande du courant.
1b. La batterie et ses contacts. Sur cette machine, avant tout le reste : des contacts de pile corrodés, ou un accu qui tient hors charge et s'effondre en charge, donnent exactement les symptômes d'une machine morte.
2. Le fusible. Beaucoup de ces machines en ont un juste derrière la prise — c'est la pièce faite pour mourir. Le tester en continuité, hors circuit. Un fusible qui resaute est un court-circuit, pas un problème de fusible.
3. Les condensateurs. Sur la plupart des machines de cet âge, c'est le suspect par défaut et non le dernier recours — les électrolytiques CMS qui fuient rongent les pistes dessous avant de donner le moindre autre signe. ⚠️ Toutes n'en sont pas là : certaines en portent très peu et ne se recappent pas par principe. Lire ce que cette page en dit avant de sortir le fer. → Recap
4. Le connecteur de cartouche. Contacts de la cartouche à l'alcool isopropylique, jamais à la gomme abrasive : elle enlève la dorure et le problème revient en pire. Côté machine, inspecter les broches du slot — écartées, tordues ou oxydées — et vérifier la continuité entre le slot et la carte.
5. L'écran. Lignes, moitié éteinte, image qui s'efface : c'est presque toujours la nappe et ses soudures, pas la dalle. Ré-enficher avant de commander quoi que ce soit. Si la machine a une sortie TV — toutes ne l'ont pas — la tester aussi : elle sépare l'écran de ce qui l'alimente.
6. Toujours rien. Maintenant, et seulement maintenant, la logique : rails sur la carte, reset, horloge, bus. → Diagnostic PCB
Lynx I ou Lynx II ? ✅
Il existe deux modèles de Lynx et cinq révisions de carte — mais ces révisions n'ont aucun impact sur le fonctionnement externe : elles ne comptent que pour le modding.
| Lynx I (1989-1991) | Lynx II (1991-1995) | |
|---|---|---|
| Format | Plus large | Plus compact |
| Autonomie | 4-5 h | 5-6 h |
| Son | Mono | Stéréo |
| Écran | Légèrement moins bon | Vaguement meilleur |
| Économie d'énergie | — | Extinction du rétroéclairage possible |
| Prise en main | — | Grips caoutchouc |
Ce qui NE change PAS — et qui compte le plus
Sur les points cruciaux, les deux modèles sont identiques :
- Aucun des deux n'a de verrou de région ;
- les deux acceptent tous les mods importants ;
- les deux fonctionnent avec les flashcarts.
Autrement dit : prendre un Lynx I n'est pas un mauvais choix. Les améliorations du Lynx II sont mineures — et l'écran, sur aucun des deux modèles, n'est vraiment bon aujourd'hui : c'est de toute façon la première cible d'un mod. (Source : ConsoleMods, CC-BY-SA, en collaboration avec io55.net.)
Sur les listes de condensateurs
ConsoleMods publie une carte des condensateurs pour le Lynx II, carte
C104471-001 REV A — mais c'est une image, pas une liste texte : il n'y a donc pas
de BOM par repère à transcrire ici. Identifier sa carte, puis suivre la carte de la
source ou une liste vérifiée (Console5). Aucune valeur n'est inventée.
Mods populaires — quoi acheter, comment
Recapper D'ABORD
Lynx I comme II : condensateurs qui fuient → son/écran défaillants. Recap avant tout autre mod.
- Écran McWill LCD : remplace la dalle d'origine floue par un LCD net et lumineux (réglages) — le mod reine. Install 🟠 (dépose écran + nappe). → fiche McWill LCD.
- Flashcart : Lynx GameDrive (RetroHQ) — jeux/homebrew sur SD, plug-and-play 🟢.
- USB-C / batterie rechargeable interne (la Lynx dévore 6 piles AA).
Photos / assets
(À ajouter : Lynx I vs II, carte, écran.)
Réparation avancée
Recap complet quasi obligatoire (fuite d'électrolytes = le sujet n°1) + écran/rétro- éclairage (mods IPS). Méthodes : Recap · Diagnostic PCB · Pistes & vias.
Documentation constructeur archivée ✅
Documentation constructeur archivée localement. ⚠️ Ce sont des manuels d'utilisation et de référence, pas des manuels de service : ils donnent les caractéristiques, les connecteurs et le fonctionnement attendu, mais pas les schémas ni les tensions de dépannage.
- Lynx — PDF
Statut
Documents constructeur sans licence explicite, conservés à titre de préservation (machines hors production depuis des décennies).
Sources & attribution
- ConsoleMods Wiki — Lynx Model Differences — CC-BY-SA — Lynx I vs Lynx II (autonomie, mono/stéréo, économie d'énergie), absence de verrou de région sur les deux, révisions de carte sans impact externe — en collaboration avec io55.net — https://consolemods.org/wiki/Lynx:Model_Differences
- ConsoleMods Wiki — Capacitor Maps — CC-BY-SA — carte des condensateurs du Lynx II
C104471-001 REV A(image, pas de liste texte transcriptible) — https://consolemods.org/wiki/Lynx:Capacitor_Maps - Wikipédia — Atari Lynx — CC-BY-SA — https://fr.wikipedia.org/wiki/Atari_Lynx
- Console5 — Lynx (cap kit CXX) — à référencer
Image :
-
lynx-board.jpg— Evan-Amos, domaine public — https://commons.wikimedia.org/wiki/File:Atari-Lynx-Motherboard-Top.jpg

Relecture & corrections
À quoi sert cet espace
Une valeur fausse, une procédure dépassée, une référence de puce qui ne colle pas à ta carte ? Signale-le ici, avec ce que tu as constaté (modèle, révision de carte, numéro de série, mesure). Chaque signalement est recoupé avec une source avant toute modification — une correction invérifiable est publiée en tant que « signalé par …, non recoupé » plutôt qu'appliquée en silence.
La lecture est ouverte à tous ; écrire demande une connexion Discord. Les signalements des relecteurs déclarés du wiki sont traités en priorité ; les autres sont lus aussi, mais passent par un humain avant toute modification.