Sega Chihiro
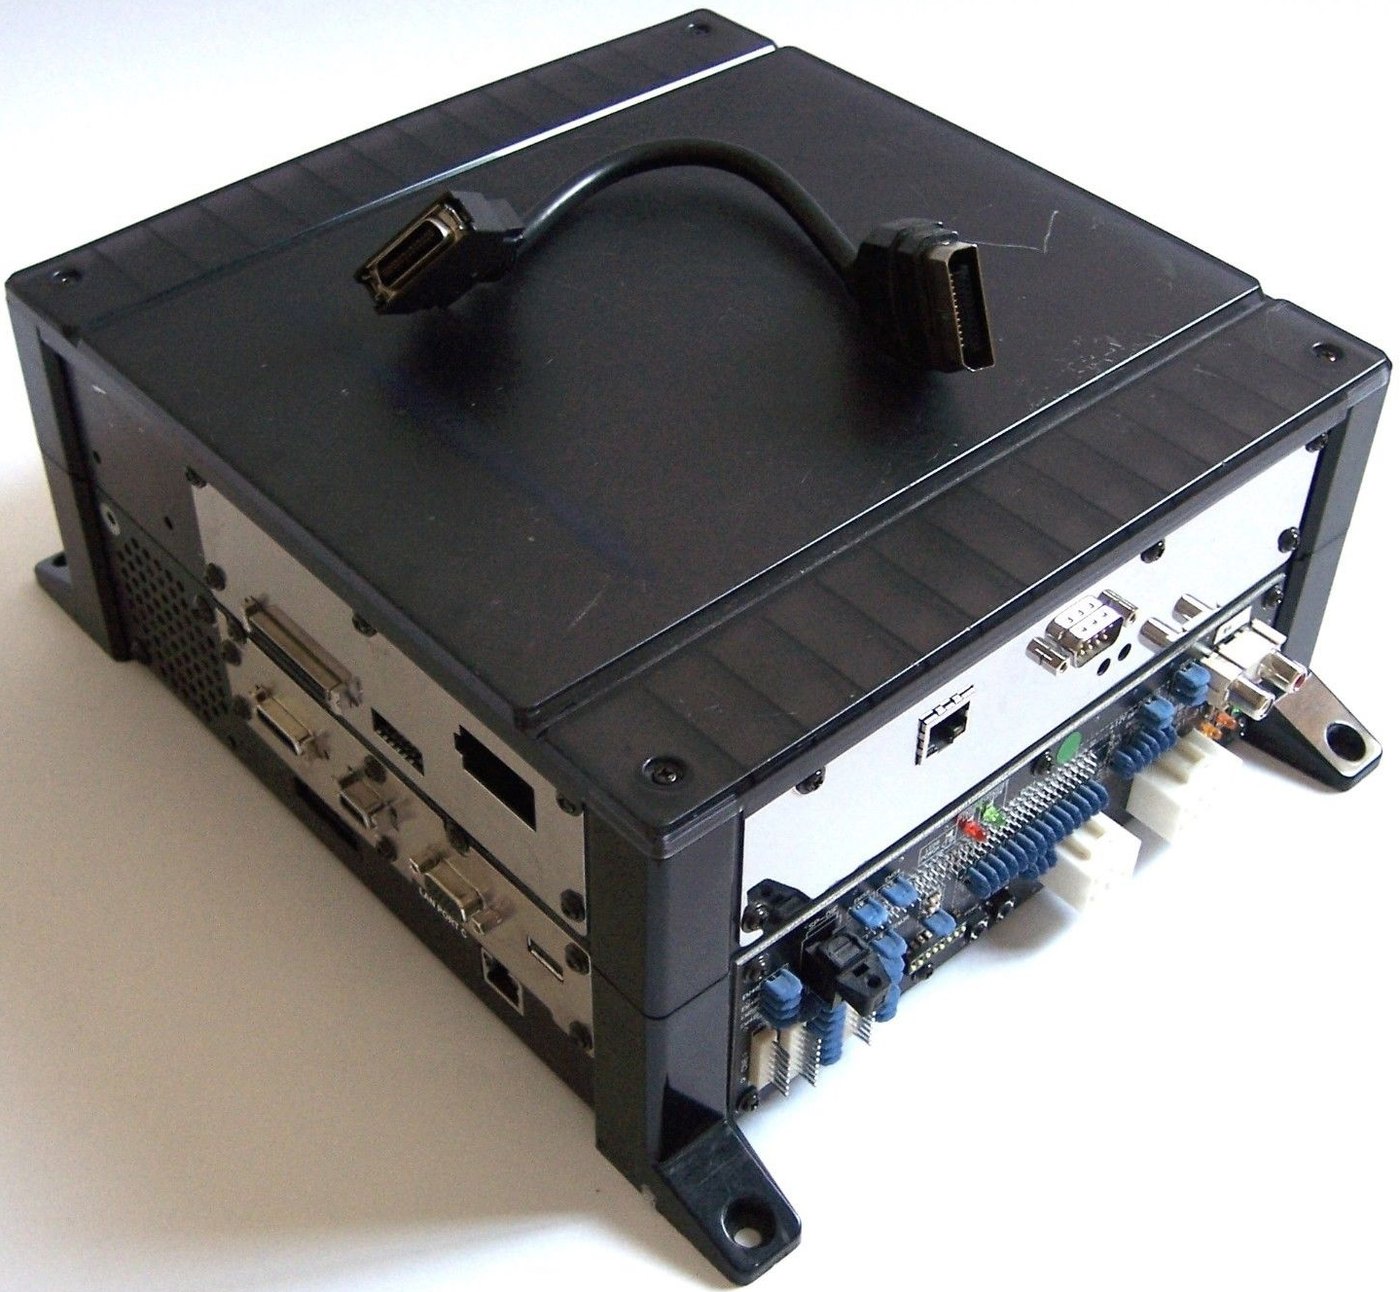
The NAOMI's successor (2002), based on Microsoft's Xbox. Pentium III + GeForce 3, GD-ROM media loaded into RAM, boot from a DIMM board (SEGABOOT). OutRun 2, Virtua Cop 3, Ghost Squad, The House of the Dead III… The Xbox kinship helps modern emulation.
Identification
| Field | Value |
|---|---|
| Manufacturer | Sega |
| Year | 2002 (The House of the Dead III) |
| Base | Microsoft Xbox (motherboard + add-on boards) |
| Media | GD-ROM + DIMM board (loaded into RAM) |
| I/O | JVS |
Architecture (≈ Xbox)
| Block | Chip | Clock | Role |
|---|---|---|---|
| CPU | Intel Pentium III | 733 MHz | Xbox base |
| GPU | NVIDIA NV2A (GeForce 3) | 3D rendering | |
| RAM | 128 MB DDR | double an Xbox (64 MB) — an arcade specific | |
| Media | GD-ROM (like NAOMI/Triforce) | copied whole to RAM at boot → no load times | |
| Boot | DIMM board (SEGABOOT XBE) | always boots from the DIMM, never another source |
Security & preservation
- DIMM boot: the Chihiro boots via a SEGABOOT (XBE) on the DIMM board; the GD-ROM game is copied to RAM.
- DIMM media + battery: logic close to the NAOMI (DIMM board), hence the importance of imaging the GD-ROMs and handling the DIMM battery.
- Emulation: the Xbox kinship helps — Chihiro support is progressing in Xbox emulators (Cxbx-Reloaded/xemu branches); GD-ROM imaging is the base.
- → Preservation & modernisation (GD-ROM/netboot, no-battery, MiSTer).
Notable games
The House of the Dead III (2002), OutRun 2 / OutRun 2 SP, Virtua Cop 3, Ghost Squad, Crazy Taxi High Roller, Sega Golf Club, Ollie King, Mahjong…
Faults & repair
Xbox-class hardware → Xbox repairs apply + arcade specifics:
| Symptom | Likely cause | Lead |
|---|---|---|
| Won't boot | DIMM board / SEGABOOT, battery | DIMM diagnosis; image before it fails |
| GD not read | Worn GD-ROM drive | Repair/image; SD solutions |
| Reboots | PSU capacitors (like Xbox) | Recap |
| Lost settings | RTC battery / config | Replace |
| Dead controls | JVS I/O / harness | JVS diagnosis |
Modernisation & mods
The common ground for every JAMMA board
Video, power, control panel and upscalers depend on the cabinet rather than the board: everything is centralised in Modernising a cabinet. To run the board outside a cabinet (at home, on a display): supergun.
- Battery 🟢: a save battery is fitted (settings/counters/RTC). A leaking battery corrodes traces — check and replace it before it leaks → save batteries.
- Optical storage 🟡: the drive is the number-one wear part. Modern routes: an ODE, netboot, or replacement by flash storage depending on the platform → PCB preservation hub.
- Scan rate 📺: derived from a home console (see the architecture above): 480i/480p output, i.e. ~15.7 kHz interlaced and ~31.5 kHz progressive. ⚠️ A 15 kHz chassis only covers the interlaced mode — plan for a tri-sync. (Derived from the platform, not measured from MAME.) → tri-sync and upscalers.
- FPGA / emulation: see the Emulation & FPGA section below.
Repair (technician)
- Xbox base: the same faults as an Xbox — the clock capacitor that leaks (first-gen Xbox) → remove/clean it before it eats the board; capacitors, PSU.
- DIMM board: boots always from the DIMM; content in RAM (battery → reload).
- GD-ROM: drive/laser → ODE mods.
- Media board / SEGABOOT: a key/media-board dependency.
→ Methods: PCB fault-finding · Recap · Backup batteries · Traces & vias
Original manuals for games on this platform ✅
Manufacturer manuals for games running on this board. Beyond the instructions, they very often carry the full DIP settings, the connector pinout, the test procedure, the parts list and the expected voltages.
- OutRun 2 — original manual (PDF)
→ Full catalogue: service manuals, wiring & game manuals
Procedure — a dead board, step by step ✅
What this adds
The general method lives in PCB diagnosis. This is its application to this platform: the same order, but with the values actually expected here, so you do not have to go back and forth.
Tools: multimeter, oscilloscope (or frequency counter), current-limited bench supply, desoldering braid. → Tooling
If the board is still in a cabinet
A CRT holds its charge with the machine unplugged. → CRT safety
1. Inspection, power off. Corrosion, cut tracks, oxidised EPROM legs, leaking SMD capacitors, dubious earlier repairs.
2. The connector, before anything else. A large share of "dead boards" are a contact problem, not a fault. Clean the contacts with isopropyl alcohol and reseat — not with an abrasive eraser on a gold edge, which takes the plating off and brings the problem back worse. It costs two minutes and settles the question.
3. Power, measured on the board. Aim for +5.0 V measured as close as possible to where power reaches the board — not at the PSU output: the drop is in the loom, and that is exactly what makes a board boot on the bench and not in the cabinet. Where you probe depends on this board's connector — JAMMA edge, JVS loom or a proprietary harness — plenty of makers kept one long after JAMMA arrived — see Identification above. → Wiring Check −5 V and +12 V too if the sound stage uses them. Suspected short: bring it up current-limited and find the hot spot.
4. /RESET. It must release after power-up. Held low = the CPU never starts. A 1–2 Hz loop is not the reset circuit, it is the watchdog: the CPU is crashing at boot, so look at the bus, not at the reset.
5. Clocks. There is no measurement table for this platform — MAME's sources yield nothing usable for it. Any frequency quoted under Architecture on this page serves as a marker; otherwise compare against a working board rather than against a number: an invented value condemns healthy parts. → PCB diagnosis
6. Bus. Activity on the main CPU's address lines tells you whether it is running or frozen. Frozen with good clocks and good reset → work RAM, bus buffers, ROMs.
7. It boots but the picture or the sound is wrong — that is another job: see Common faults on this page, then signal tracing.
Emulation & FPGA
- Emulation: Xbox emulators (xemu / Cxbx-Reloaded) with improving Chihiro support. No FPGA core (a full PC).
Lineage
Successor to the NAOMI; a console-based cousin of the Triforce (GameCube) and the Lindbergh (PC).
Photos / assets
(To add: Chihiro board, DIMM board, GD-ROM drive, JVS I/O.)
Sources & attribution
- Sega Retro / Sega Wiki — Chihiro Arcade Board (Xbox, PIII 733, NV2A, 128 MB, GD-ROM + DIMM SEGABOOT) — CC-BY-SA — https://sega.fandom.com/wiki/Chihiro_Arcade_Board
- ConsoleMods — Xbox: Chihiro General Information — https://consolemods.org/wiki/Xbox:Chihiro_General_Information
- Arcade Otaku — Sega Chihiro — https://wiki.arcadeotaku.com/w/Sega_Chihiro
Image:
-
chihiro-systeme.jpg— uploaded by Black Squirrel to Sega Retro (site CC BY 4.0; ⚠️ the file carries no individual licence) — https://segaretro.org/File:Chihiro_system.jpg

Review & corrections
How this space is used
Spotted a wrong value, an outdated procedure, a chip reference that does not match your board? Say so here, with what you observed (model, board revision, serial number, measurement). Every report is cross-checked against a source before anything changes — an unverifiable correction is published as “reported by …, not cross-checked” rather than silently applied.
Reading is open to everyone; posting requires signing in with Discord. Reports from the wiki's declared reviewers are handled first; anyone else's are read too, but go through a human before anything is changed.