Commodore CDTV
An Amiga 500 disguised as a set-top player (1991): Commodore put an Amiga 500 + a CD-ROM drive in a black hi-fi case, driven by an infrared remote. Pitched as living- room "multimedia" ahead of its time, very expensive ($999 / £499) → a commercial flop.
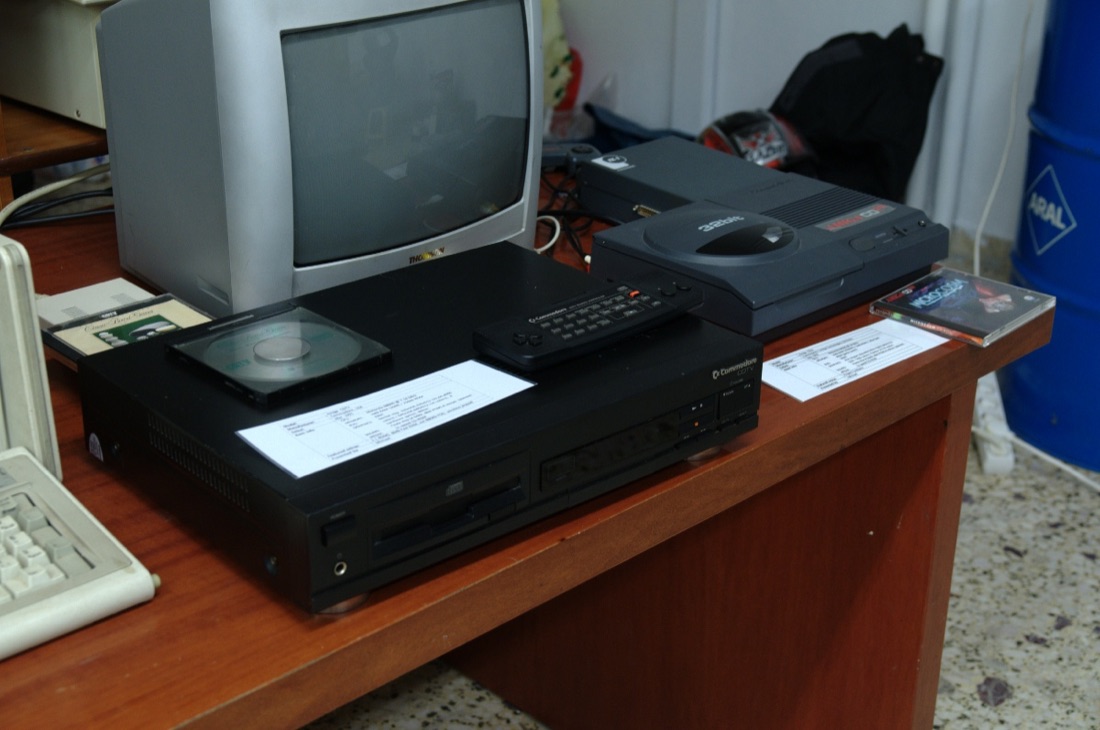
Commodore CDTV — photo by Soupmeister, CC BY-SA 2.0 (Wikimedia Commons).
Identification
| Field | Value |
|---|---|
| Manufacturer | Commodore |
| Released | 1991 |
| Nature | Amiga 500 + CD-ROM drive (caddy) + IR remote |
| Price | $999 (US) / £499 (UK) |
| Media | CD-ROM (single-speed) + cartridge/disk via accessories |
| Outputs | Composite, RGB, S-Video, SCART, RF (by region); RCA + jack audio |
Architecture (detail)
| Block | Chip | Clock | Role |
|---|---|---|---|
| CPU | Motorola 68000 | 7.16 MHz (NTSC) / 7.09 MHz (PAL) | same as Amiga 500 |
| Chipset | OCS (Agnus / Denise / Paula) | Amiga graphics + 4-channel sound (ECS supported) | |
| Memory | 1 MiB Chip RAM | expandable; 2 KiB NVRAM battery-backed | |
| Optical | 1× CD-ROM with proprietary controller | + CD audio / CD+G playback |
Software-wise it's an Amiga: with the accessories (keyboard, mouse, disk drive) the CDTV becomes a full Amiga 500 computer. It predated mainstream CD-ROM — but its price and a thin CD library doomed it (≈ 30,000 UK units). The CD32 (1993) reused the idea on an Amiga 1200 / AGA base.
Repair (technician)
Leaking NVRAM battery — check this first
Like many Amiga machines with a battery-backed clock/NVRAM, the CDTV has a (Varta-like) battery that leaks and eats the traces around its footprint. Remove it immediately on any stored CDTV; neutralise (vinegar/alcohol), inspect and repair the corroded traces, fit a lithium cell with a diode or a supercapacitor.
- CD drive: the caddy mechanism is fragile; the loading/tray belt slips, the laser ages → optical cleaning, adjusting the laser power pot as a last resort, replacing the unit if possible.
- Capacitors: routine recap of the PSU/audio stage (period electrolytics).
- Kickstart compatibility: the CDTV holds a Kickstart 1.3 + CDTV extension in ROM; some software wants a specific version.
- PSU: internal (unlike the A500's external brick) → check the mains stage.
Common faults
| Symptom | Likely cause | Lead |
|---|---|---|
| Corrosion near the clock | leaked NVRAM battery | Remove battery, clean/repair traces |
| CD not read | belt/laser/caddy | Clean optics, belt, adjust laser |
| Won't boot | internal PSU / Kickstart | Check voltages, reseat ROM |
| Noisy sound/picture | tired caps | Targeted recap |
Procedure — a dead console, step by step ✅
What this adds
Ordered for a console, not for an arcade board: what kills these is almost never the CPU. It is, in real order, the power supply, the capacitors, the drive or the cartridge slot, and only then the logic. → PCB diagnosis
1. The power supply. Two cases, depending on the machine. External brick: ⚠️ read the marking on the machine, next to the socket, and check the adapter against it — voltage and polarity. A centre-negative machine fed centre-positive loses its fuse, sometimes its regulator; do not trust a third-party label or a generic tip. Internal supply (the machine plugs straight into the wall): mains is inside the shell. Unplug, wait, and confirm the large capacitors are discharged before touching the board. Either way, measure under load: a failing supply holds its voltage until it is asked for current.
2. The fuse. Many of these machines have one right behind the socket — it is the part designed to die. Test it in continuity, out of circuit. A fuse that blows again is a short, not a fuse problem.
3. Capacitors. On most machines of this age this is the default suspect rather than a last resort — leaking SMD electrolytics eat the tracks underneath before they give any other sign. ⚠️ Not all of them are like that: some carry very few and are not recapped on principle. Read what this page says about it before reaching for the iron. → Recap
4. The drive. On this machine it is the dominant failure point. In order: does the tray move, does the disc spin, is the lens clean (cotton bud, isopropyl alcohol, no pressure), do the rails slide freely. A laser that no longer reads gets replaced; the gain pot is not something to tweak blind — that is the move that finishes off a laser that was still good.
5. Video output. Isolate the machine from the display: another cable, another TV, another input. A sizeable share of "dead consoles" are a dead cable, or a display that will not lock onto what this machine outputs — see the video section of this page for what that is.
6. Still nothing. Now, and only now, the logic: rails on the board, reset, clock, bus. → PCB diagnosis
Mods & preservation — what to buy, how
Remove the Varta battery FIRST
The CDTV carries a Varta/Ni-Cd battery that leaks and eats the board (like the Amigas). Remove it urgently, clean the electrolyte, repair eaten traces, then replace with a CR2032 + diode (no recharge) if you want to keep the clock. Survival step #1.
- ODE / CD emulator 🟡: replaces the tired optical drive (images from SD) → see ODE mods. Image your CDs while they still read.
- Native RGB video 🟢: the CDTV (an Amiga 500 in a box) outputs RGB on the video connector → a SCART cable then OSSC/RetroTINK. No internal mod.
- "Amiga" mods: the CDTV takes the same upgrades as an A500 (memory expansion, Kickstart, a Gotek for the external floppy) → see the Amiga computer side.
- Preventive recap.
- ⚠️ Do not host games/Kickstart — method only.
Photos / assets
(To add: CDTV, IR remote, CD caddy, motherboard, NVRAM battery.)
Advanced repair — cross-cutting methods
Backup batteries · ODE (optical drive) · Recap · Traces & vias.
Archived technical documentation ✅
Manufacturer documentation archived locally: schematics, block diagrams, expected voltages, parts lists. The reference when a symptom matches no known fault.
- CDTV — PDF
Status
Manufacturer documents kept for preservation (machines out of production for decades), with no explicit licence — the same position as for the cabinet manuals already archived here.
Sources & attribution
-
Photo Commodore CDTV — Soupmeister, CC BY-SA 2.0, Wikimedia Commons — https://commons.wikimedia.org/wiki/File:Commodore_CDTV_-_Retrosystems_2010.jpg
-
Wikipedia — Commodore CDTV (Amiga 500 + CD, OCS, 68000, 1 MiB, price, reception) — CC-BY-SA — https://en.wikipedia.org/wiki/Commodore_CDTV
- Internal: ODE mods

Review & corrections
How this space is used
Spotted a wrong value, an outdated procedure, a chip reference that does not match your board? Say so here, with what you observed (model, board revision, serial number, measurement). Every report is cross-checked against a source before anything changes — an unverifiable correction is published as “reported by …, not cross-checked” rather than silently applied.
Reading is open to everyone; posting requires signing in with Discord. Reports from the wiki's declared reviewers are handled first; anyone else's are read too, but go through a human before anything is changed.