PC Engine CD-ROM² / Duo
The CD-ROM add-on for the PC Engine (1988), evolved into Super CD-ROM² then integrated into the Duo (1991, Duo-R, Duo-RX). THE preservation nightmare: the SMD capacitors that leak and corrode — recap almost mandatory. The modern solution: the Super SD System 3 ODE.
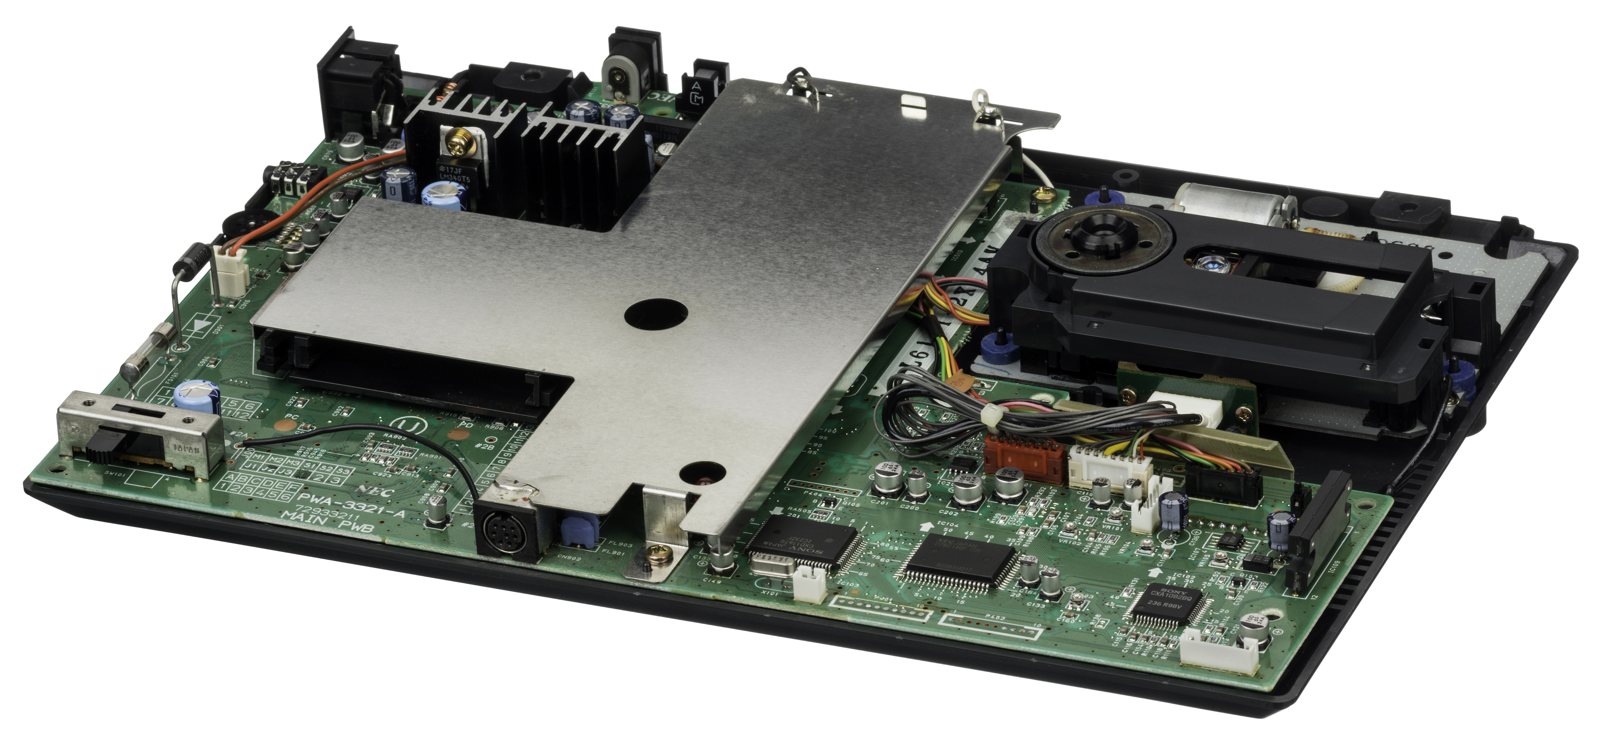
Identification
| Field | Value |
|---|---|
| Manufacturer | NEC / Hudson |
| Releases | CD-ROM² (1988) · Super CD-ROM² (1991) · Duo (1991) |
| Type | CD add-on (or Duo = all-in-one) |
| Media | CD-ROM + System Card (CD BIOS on a HuCard) |
Architecture (the CD addition)
The CPU/video stay those of the PC Engine (HuC6280 + HuC6270/60). The CD add-on brings:
| Block | Element | Notes |
|---|---|---|
| Sound decoder | ADPCM (Oki-like) | plays compressed CD voice/music |
| Buffer RAM | 64 KB (CD-ROM²) → 256 KB + 2 KB (Super CD-ROM²) | the System Card defines the available RAM/BIOS |
| BIOS | System Card (HuCard) | v1/v2/v3; Super System Card (v3) required for "Super CD-ROM²" games |
| Save | battery-backed internal RAM (BRAM) | shared saves |
The generation (CD-ROM² vs Super CD-ROM² vs Arcade Card) is distinguished by the amount of RAM the system card unlocks — a key compatibility criterion.
The Arcade Card (the top tier)
The Arcade Card adds 2 MB of extra RAM, essential for the big SNK/Neo-Geo arcade ports (Fatal Fury, Art of Fighting, World Heroes). Two forms: Arcade Card Duo (for the Duo/Super CD-ROM²) and Arcade Card Pro (also includes the Super BIOS, for a plain CD-ROM²). It's the highest tier of the PC Engine CD compatibility stack.
⚠️ Recap — almost mandatory
The Duo/CD capacitors leak and eat the traces
The electrolytic SMDs in the CD units (especially Duo / Duo-R) leak systematically → no more sound, no CD reading, trace corrosion. Recap imperative on purchase, + electrolyte cleaning and repair of the affected traces. Per-CXX list: see Console5.
Common faults
| Symptom | Likely cause | Lead |
|---|---|---|
| No sound / no CD boot | Leaked capacitors + traces | Recap + trace repair |
| Won't read CDs | Worn / misaligned laser | Adjust/replace, or ODE |
| System Card not read | HuCard contacts | Cleaning |
| Visible corrosion | Cap leak | Neutralise, recap, jumper the traces |
Procedure — a dead console, step by step ✅
This machine does not run on its own
It needs a PC Engine. Before opening anything, prove the host is good with a plain cartridge — otherwise you spend the day inside the add-on for a fault that is not in it. → PC Engine
What this adds
Ordered for a console, not for an arcade board: what kills these is almost never the CPU. It is, in real order, the power supply, the capacitors, the drive or the cartridge slot, and only then the logic. → PCB diagnosis
1. The power supply. Two cases, depending on the machine. External brick: ⚠️ read the marking on the machine, next to the socket, and check the adapter against it — voltage and polarity. A centre-negative machine fed centre-positive loses its fuse, sometimes its regulator; do not trust a third-party label or a generic tip. Internal supply (the machine plugs straight into the wall): mains is inside the shell. Unplug, wait, and confirm the large capacitors are discharged before touching the board. Either way, measure under load: a failing supply holds its voltage until it is asked for current.
2. The fuse. Many of these machines have one right behind the socket — it is the part designed to die. Test it in continuity, out of circuit. A fuse that blows again is a short, not a fuse problem.
3. Capacitors. On most machines of this age this is the default suspect rather than a last resort — leaking SMD electrolytics eat the tracks underneath before they give any other sign. ⚠️ Not all of them are like that: some carry very few and are not recapped on principle. Read what this page says about it before reaching for the iron. → Recap
4. The drive. On this machine it is the dominant failure point. In order: does the tray move, does the disc spin, is the lens clean (cotton bud, isopropyl alcohol, no pressure), do the rails slide freely. A laser that no longer reads gets replaced; the gain pot is not something to tweak blind — that is the move that finishes off a laser that was still good.
5. Video output. Isolate the machine from the display: another cable, another TV, another input. A sizeable share of "dead consoles" are a dead cable, or a display that will not lock onto what this machine outputs — see the video section of this page for what that is.
6. Still nothing. Now, and only now, the logic: rails on the board, reset, clock, bus. → PCB diagnosis
Mods & preservation — what to buy, how
- Super SD System 3 (Terraonion) 🟢: the flagship mod. Plugs into the expansion bus and replaces CD + System Card BIOS + RAM with SD storage — no laser, CD games loaded from the card, built-in BIOS. No soldering (external module). → Super SD System 3 page.
- Recap: a mandatory prerequisite before anything (see the Recap section above) — the Duo/CD SMD caps leak.
- RGB: clean output goes through the host PC Engine (RGB mod per model) → see PC Engine page.
Photos / assets
(To add: Duo, caps/corrosion area, laser block, System Card.)
Advanced repair
SMD recap all but mandatory (electrolyte leakage = the No. 1 issue, especially Duo/CD) + laser/optics. Methods: Recap · ODE (optical drive) · Traces & vias.
Sources & attribution
- Wikipedia — TurboGrafx-CD — CC-BY-SA — https://en.wikipedia.org/wiki/TurboGrafx-16
- Console5 / ConsoleMods — PC Engine Duo (CXX recap) — to reference
Image:
-
pc-engine-cd-board.jpg— Evan-Amos, public domain — https://commons.wikimedia.org/wiki/File:NEC-Turbo-Duo-Motherboard-FL.jpg

Review & corrections
How this space is used
Spotted a wrong value, an outdated procedure, a chip reference that does not match your board? Say so here, with what you observed (model, board revision, serial number, measurement). Every report is cross-checked against a source before anything changes — an unverifiable correction is published as “reported by …, not cross-checked” rather than silently applied.
Reading is open to everyone; posting requires signing in with Discord. Reports from the wiki's declared reviewers are handled first; anyone else's are read too, but go through a human before anything is changed.