Sega Versus City
Sega's back-to-back candy cab: two players facing each other, each with their own screen and controls. Designed for versus fighting games (VF, etc.). Two monitors, one game.
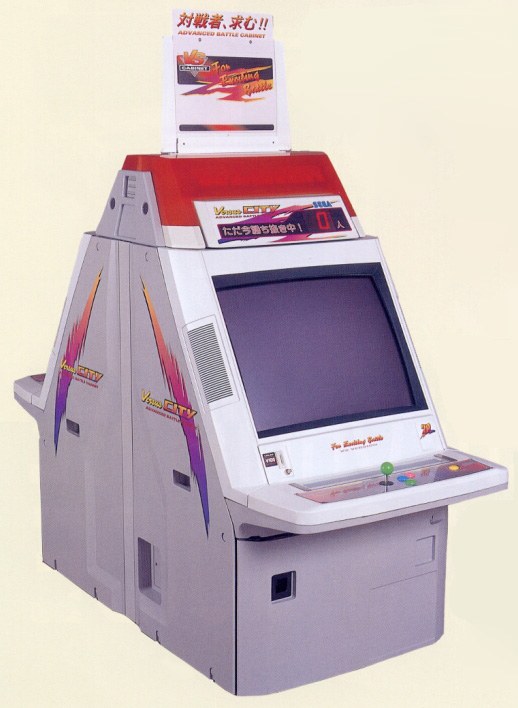
Identification
| Field | Value |
|---|---|
| Manufacturer | Sega |
| Type | Back-to-back candy cab (2 screens) |
| Screen | 2 × CRT 29" |
| Controls | 2 player stations (one on each side) |
| PCB format | JAMMA |
⚡ Connector & power
| Aspect | Value |
|---|---|
| PCB connector | JAMMA (a single PCB drives 2 screens) |
| Monitor sync | 15/24 kHz (2× 29″ CRT) |
| Power | 100 V AC (Japan) |
| Consumption | 301 W (AC 100 V 50/60 Hz) — Sega manual |
| Dimensions | 750 × 1834 × 1950 mm (W×D×H) — Sega manual |
| Weight | ~198 kg (manual: 約198 kg) |
| PSU capacity for the game board | +5 V 12 A · +12 V 1.5 A · −5 V 0.1 A — ⚠️ a ceiling, see below |
Dimensions reconfirmed in English by the 1995 Sega flyer
The High Performance Cabinets Guide — front · spec strip — (© SEGA 1995.11) carries the Versus City bilingually, removing the last doubt about the order: 外形寸法 W: 750mm · D: 1,834mm · H: 1,950mm; SPECIFICATIONS Outer dimensions W: 75 cm, 29.52 in. · D: 183.4 cm, 72.20 in. · H: 195 cm, 76.76 in.; Weight 200kg, 445.61 lbs; Power AC 100V 301W; Monitor 29 inch monitor × 2, (HORIZONTAL TYPE MONITORS).
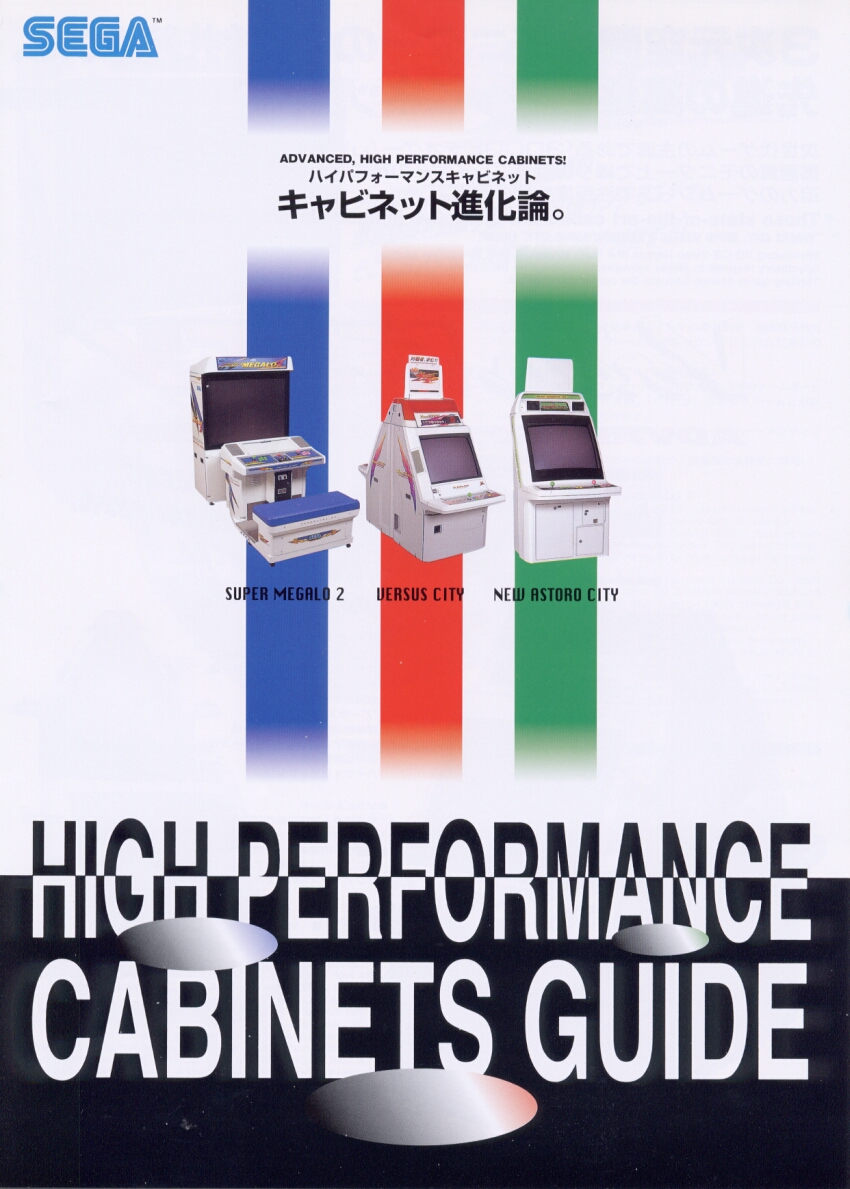
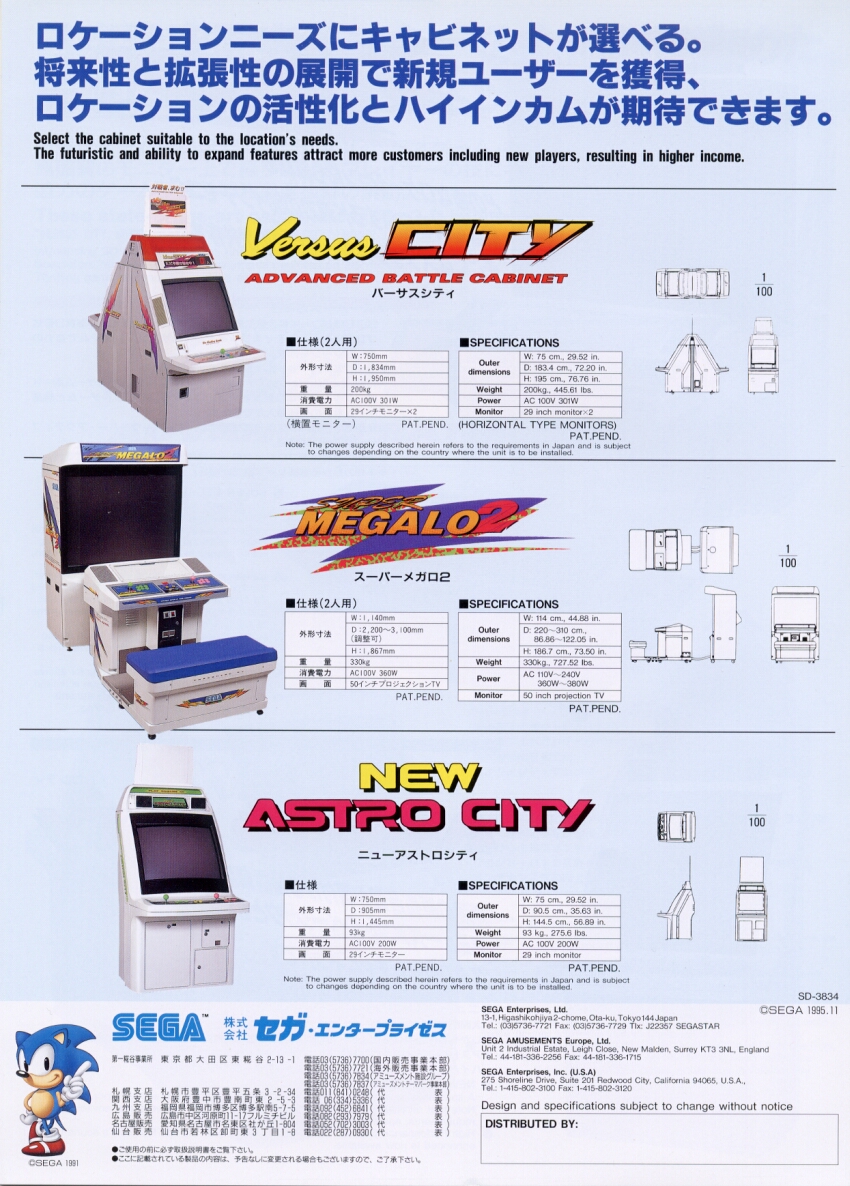
The weight differs slightly from the manual (200 kg on the flyer, 約198 kg in the manual) — two Sega documents, a negligible gap. The consumption is identical: 301 W.
Power ceiling for the game board — this is a manufacturer's warning
The manual, folio 1 (p. 7 of the PDF), 警告 box: "The power capacity provided for the VERSUS CITY's game board is +5 V 12 A, +12 V 1.5 A, −5 V 0.1 A. Never use a game board requiring more than this: risk of overheating and fire."
This is a rare figure — most cabinet datasheets do not publish it — and it is decisive before fitting a power-hungry board (Naomi + GD-ROM, System 246…) into a cabinet that is already driving two monitor stages.
Do not confuse it with the New Versus City
Until now this page carried the figures of the New Versus City, which is a different machine: same footprint, but 1678 mm tall against 1950 here, and 224 kg against ~198. Two machines merged into one datasheet.
Figures established from the manufacturer's manual
The Sega manual archived here gives, on page 5 of the PDF, in the 仕様 box: 所要面積: 750 mm (幅) × 1,834 mm (奥行), 高さ 1,950 mm, 消費電力 301 W, 重量 約198 kg. The manufacturer labels its figures — 幅 = width, 奥行 = depth. The cabinet is therefore narrow and deep, as expected of a back-to-back unit.
This page previously published "1834 × 750 × 1950" after Arcade Otaku, which lists depth first without declaring it — the same cause as the five inversions corrected elsewhere on this wiki. This is the sixth, and the document that settles it was already in the repository, linked from this very page.
(Sources: archived Sega service manual for the dimensions, consumption, weight and PSU capacity. Arcade Otaku / Highway Games for the rest. ⚠️ The Arcade Otaku infobox reads "1834 x 750 x 1950" without declaring the order — do not copy it as-is.)
Specifics
- Two screens / two stations connected to a single PCB (the game handles the face-to-face display).
- More complex (doubled) wiring than a simple candy cab.
Technical notes
- Two monitors driven by a single PCB: the game must handle the face-to-face output (or a dedicated splitter/doubled harness depending on the setup). Wiring is more complex than a simple candy cab.
- Sync: 15/24 kHz (original CRT versions).
- Power: Sega "candy" block(s) → Sega candy cab PSU (note: two monitor stages = increased load).
- Monitor chassis: maintenance/recap like the Nanao MS8/MS9.
- Use: ideal for versus (VF, KOF…) — each player sees their own screen.
Shared info
Basic wiring, disassembly: close to the Astro City.
Internal boards
- 🖥️ 2 monitors CRT → repair like the Nanao MS8/MS9.
- ⚡ Sega power block(s).
Manuals (archived)
- 📘 Sega Versus City manual (PDF)
(Source: Arcade Otaku Wiki, archived locally for preservation.)
Procedure — a cabinet that will not start ✅
There is a CRT in this cabinet
The tube stays charged with the cabinet unplugged, and the anode cap is the first thing your hand meets behind the monitor. Discharge it, work with one hand, and never alone if you can help it. → CRT safety
This cabinet is documented as 100 V
It does not go straight onto a European socket. It needs a step-down transformer rated for the whole cabinet, monitor included — not a travel adapter. Feeding 230 V to a cabinet built for 100 V destroys the supply, and usually the monitor with it. → Cabinet power
What this adds
Ordered for a cabinet, not for a board: mains, low-voltage supply, loom, monitor, then the game. The overwhelming majority of "dead cabinets" are dead for a reason that has nothing to do with the PCB — which is why the board comes last here.
1. Mains, and what sits between it and the cabinet. The switch, the fuse or breaker, the isolation transformer if there is one. A cabinet that shows no sign of life at all is almost never electronic.
2. The low-voltage supply — measured under load. Aim for +5 V where power reaches the board — the JAMMA edge, or the JVS power connector, depending on the cabinet — with the game running, not on an idle bench. If the supply has an adjustment (most candy and JVS bricks do; the ATX brick in a PC cabinet does not), do it then and not before: set off-load, it leaves a board that boots and then glitches. With no adjustment the measurement still earns its keep — it tells you whether the supply holds. Check +12 V too, and −5 V if the board uses it: many do not, and an ATX brick does not provide it. → Cabinet power
3. The loom and the connector. Reseat, and check the grounds — a cabinet with a poor ground gives rolling picture, phantom inputs and noise, all at once, and none of it looks like a wiring fault. Connector on this cabinet: JAMMA. → Wiring
4. The monitor. This page describes the monitor as: 2 × CRT 29". CRT: no picture but the tube is warm and there is EHT — that is sync or video, not the tube. No EHT at all — chassis. A picture that shrinks, wanders or shifts colour is a chassis recap, and on these monitors that is a scheduled job, not a repair.
5. Scan rate — the mismatch that breaks nothing. If the board's rate is not one the monitor accepts, you get no picture and nothing is faulty. Check what this cabinet takes against what the board puts out before opening anything. → Modernising a cabinet
6. The control panel. Microswitches and the loom, in that order. A single dead direction is a switch; a whole player dead is the loom or its ground. → Control panels
7. Coin mech and sound. Last, because they hide nothing: a mech that no longer registers is usually dirty or misadjusted, and silence with a good picture points at the amplifier and its supply rails.
Photos / assets
(To add: Versus City, the two stations, wiring.)
Repair & maintenance
Modernise (video, PSU, JVS, upscaler, PC/FPGA) → Modernising a cabinet. CRT monitor (discharge HV!) → CRT safety + Nanao MS8 / MS9 chassis · Sega candy PSU → PSU repair · recap → Recap.
Sources & attribution
- Arcade Otaku Wiki — Sega Versus City — https://wiki.arcadeotaku.com/w/Sega_Versus_City
Image:
-
versus-city-borne.jpg— catalogue view, source Hard*Candy (⚠️ no licence statement anywhere on the site) — https://www.hard--candy.com/wiki/candy/VersusCity
Review & corrections
How this space is used
Spotted a wrong value, an outdated procedure, a chip reference that does not match your board? Say so here, with what you observed (model, board revision, serial number, measurement). Every report is cross-checked against a source before anything changes — an unverifiable correction is published as “reported by …, not cross-checked” rather than silently applied.
Reading is open to everyone; posting requires signing in with Discord. Reports from the wiki's declared reviewers are handled first; anyone else's are read too, but go through a human before anything is changed.