Nintendo DS
Nintendo's dual-screen (touch) handheld (2004), a huge success. GBA backward-compatible (DS / DS Lite). Available as the DS Lite and DSi. A large homebrew playground via flashcart.
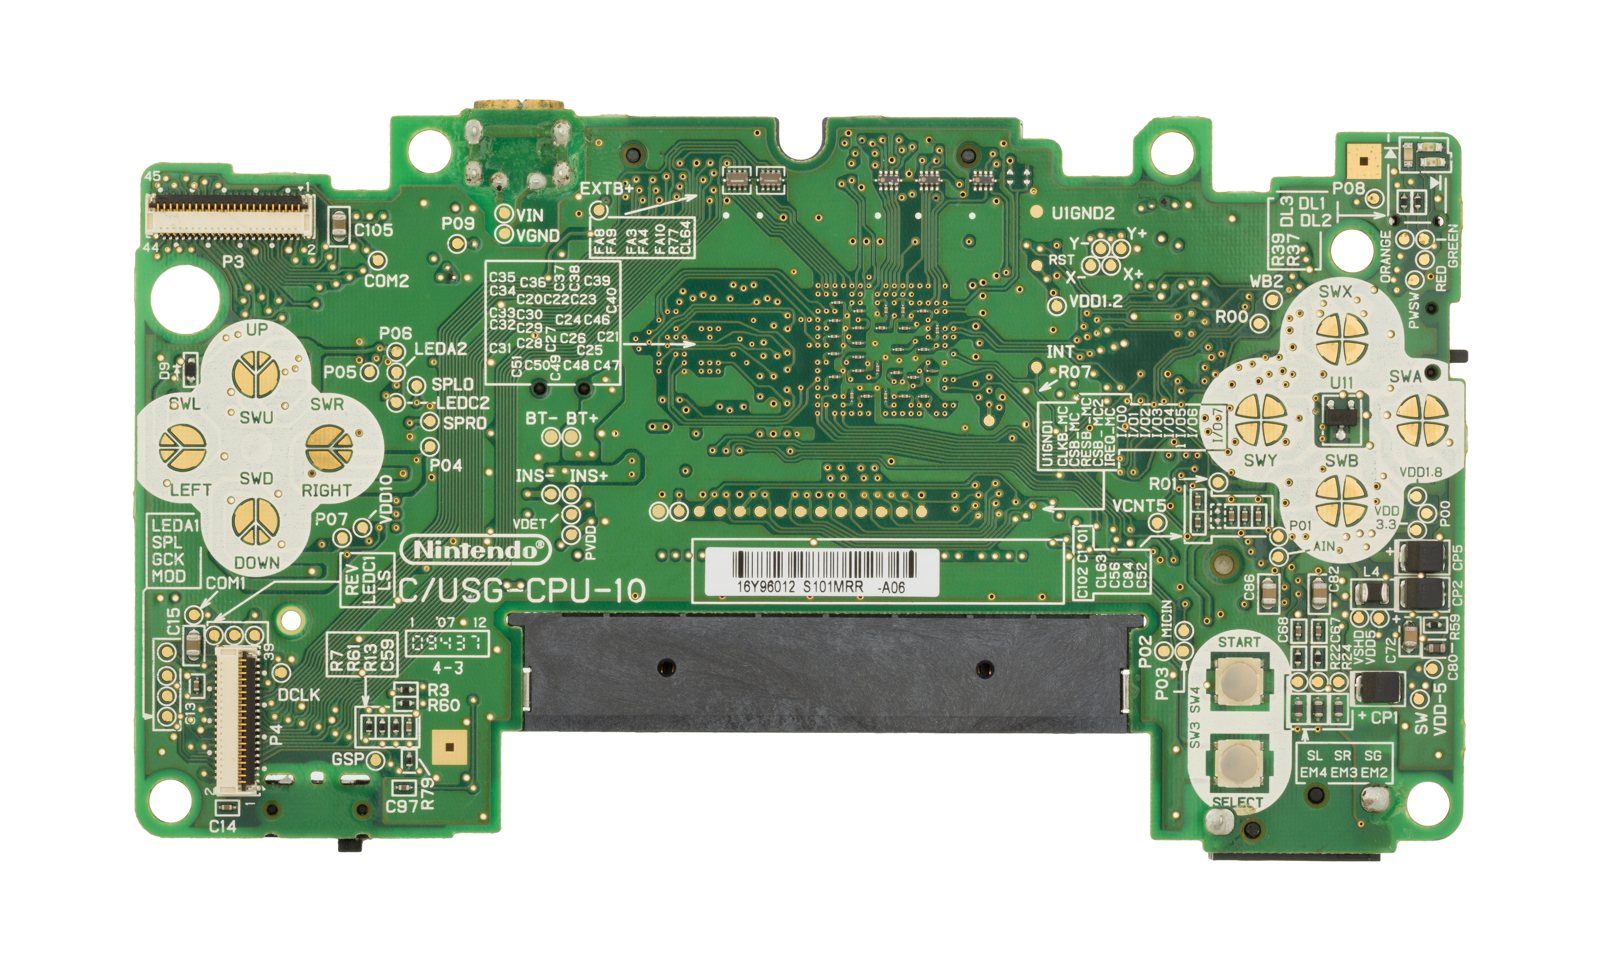
Identification
| Field | Value |
|---|---|
| Manufacturer | Nintendo |
| Releases | DS (2004) · DS Lite (2006) · DSi (2008) |
| Screens | 2 (one touch) |
| Backward-compat | GBA (DS / DS Lite; not the DSi) |
| CPU | ARM946E-S @ 67 MHz (ARM9) + ARM7TDMI @ 33 MHz (ARM7) |
| Screens | 2 × 256×192 (the lower one resistive touch) |
| RAM | 4 MB (DS/Lite) · 16 MB (DSi); built-in WiFi |
Architecture (2D + 3D)
The DS pairs two engines: a 2D engine (a GBA descendant, two layers per screen) and a hardware 3D engine (textured polygon rendering, ~120k polygons/s) shared between the two screens. The ARM9 runs the game and 3D; the ARM7 handles sound, touch, WiFi and GBA backward-compat (that ARM7TDMI is what runs GBA games). Hence the two slots: the DS card (top) and the GBA cartridge (bottom, DS/DS Lite only).
DS vs DSi & backward-compat
| Model | GBA slot | New features | Region lock |
|---|---|---|---|
| DS / DS Lite | yes | Lite: brighter screens, slimmer | region-free |
| DSi / DSi XL | no | 2 cameras, SD card, DSiWare, browser | DSi-enhanced games region-locked; plain DS games region-free |
GBA slot & connectivity
The slot 2 (GBA cartridge) also acts as an expansion on DS/DS Lite: - Rumble Pak (vibration), Memory Expansion Pak (RAM for the Opera browser), the Guitar Hero: On Tour grip, sensors for some games. The DSi drops this slot. - Built-in wireless: Download Play (one shared game to several units), PictoChat, online play via Nintendo Wi-Fi Connection (closed service), connectivity with the Wii and some GameCube/Wii games.
Preservation & homebrew
- Flashcarts: R4 & clones (slot 1), DSTwo/SuperCard (with a CPU for emulation) — a big homebrew scene; the DSi/3DS hardens security (but Unlaunch, Memory Pit exploits). → see Softmods.
- Emulation: melonDS (accurate), DeSmuME.
Common faults
| Symptom | Likely cause | Lead |
|---|---|---|
| Broken hinge (DS Lite) | Fragile shell/hinge | Replace shell/hinge |
| Screen (lines/touch) | Ribbon / panel | Replace the panel or ribbon |
| Flaky L/R buttons | Worn switches | Replace/clean |
| Contacts / card reader | Wear | Cleaning |
Step-by-step disassembly procedures ✅
5 procedures transcribed from the iFixit guides, with difficulty and estimated time.
| Procedure | Difficulty | Time |
|---|---|---|
| Repairing Nintendo DS Back Panel | Easy | 5 Minutes |
| Repairing Nintendo DS Battery | Very easy | 1 Minute |
| Repairing Nintendo DS Bottom LCD Screen | Easy | 10 Minutes |
| Repairing Nintendo DS Main Circuit Board | Easy | 10-15 minutes |
| Repairing Nintendo DS Top LCD Screen | Easy | 5 Minute |
Repairing Nintendo DS Back Panel
Removing the back panel is simple, provided you have the correct screwdriver. Nintendo uses a special Tri-wing bit for the case, be sure you have one of these before disassembling!
- Remove the 7 tri-wing screws located on the back.
- It might be helpful to remove the strap from the hole to access the top left screw.
- Remove the 7 tri-wing screws located on the back.
- It might be helpful to remove the strap from the hole to access the top left screw.
Repairing Nintendo DS Battery
Taking out the battery is extremely easy! All you need is a small Phillips Screwdriver!
- Use a Phillips #00 Screwdriver to remove the screw securing the battery door to the rear case.
- Remove the battery door.
- Use a plastic opening tool to pry open the battery from the bottom. If a tool isn't available, your fingernails will work fine as well.
Repairing Nintendo DS Bottom LCD Screen
After removing the circuit board, the bottom LCD screen can easily be removed from the Nintendo DS.
- Peel off the back foam on the bottom touch screen to expose the ribbon cable.
- Gently lift the screen out of the base.
Repairing Nintendo DS Main Circuit Board
The removal of the main logic board of the DS is essential to access the screens and to replace other components.
- Using a Phillips #00 screwdriver, remove the 4 screws on the circuit board.
- Be careful NOT to slip with the screwdriver, you can damage the circuit board!
- Unlock the two large ribbon cables by moving the black clip up.
- Carefully pull the ribbon cables down and out with your fingers.
- Do not use pliers to pull the cables, as they can be damaged easily.
- Locate the two small ribbon cables, beneath the rightmost large ribbon cable.
- Slide the locks for the small ribbon cables down to the side, and remove the cables.
- It may be useful to use tweezers to remove the small ribbon cables.
- Be careful not to damage the delicate ribbon cables.
- Locate the Wifi antenna pigtail connector
- Remove the antenna by grasping it at the head with tweezers. Using a slight rocking motion, pull up to dislodge the connector.
- Locate the Wifi antenna pigtail connector
- Remove the antenna by grasping it at the head with tweezers. Using a slight rocking motion, pull up to dislodge the connector.
Repairing Nintendo DS Top LCD Screen
The top LCD is easy to remove once the rest of the cover and circuit board have been taken out.
- Use a flat head screwdriver or a dental tool to lift the 4 rubber screw covers.
- Using a Phillips #00 screwdriver, remove the 4 screws beneath the rubber caps.
- Using a soft plastic tool, pry the edges of the plastic case apart at the seam.
- Separate the top cover from the body.
- Using a Phillips #00 screwdriver, remove the screw holding the hinge cover in place.
- Remove the hinge cover and set it aside.
- Feed the ribbon cables and the Wifi pigtail cable through the opening in the hinge cover.
- Remove the yellow spacer, and set aside.
- Using a Phillips #00 screwdriver, remove the two screws holding down the speaker circuit boards.
- Move the black lock on the two large ribbon cables up with a pry tool, and gently pull out the two ribbon cables.
- For the small ribbon cable, pull the lock downwards.
- Gently pull out the small ribbon cable from the connector.
- Set the two small circuit boards aside
- Be careful not to damage the two delicate ribbon cables when removing them from the DS.
- Move the black lock on the two large ribbon cables up with a pry tool, and gently pull out the two ribbon cables.
- For the small ribbon cable, pull the lock downwards.
- Gently pull out the small ribbon cable from the connector.
- Set the two small circuit boards aside
- Be careful not to damage the two delicate ribbon cables when removing them from the DS.
Source, licence and scope
iFixit guides, under Creative Commons BY-NC-SA — attribution, non-commercial, share-alike. Only the text is reproduced; the step photos stay on iFixit. ⚠️ These guides target the model named in the title: on another revision, the screws and the order of removal may differ.
Procedure — a dead console, step by step ✅
Backlight and battery
The backlight inverter carries a high voltage, live, on a board you are holding. And a swollen lithium cell is not to be pierced or bent — take it out first and put it somewhere safe.
What this adds
Ordered for a console, not for an arcade board: what kills these is almost never the CPU. It is, in real order, the power supply, the capacitors, the drive or the cartridge slot, and only then the logic. → PCB diagnosis
1. The power supply. Two cases, depending on the machine. External brick: ⚠️ read the marking on the machine, next to the socket, and check the adapter against it — voltage and polarity. A centre-negative machine fed centre-positive loses its fuse, sometimes its regulator; do not trust a third-party label or a generic tip. Internal supply (the machine plugs straight into the wall): mains is inside the shell. Unplug, wait, and confirm the large capacitors are discharged before touching the board. Either way, measure under load: a failing supply holds its voltage until it is asked for current.
1b. Battery and its contacts. On this machine, before anything else: corroded battery contacts, or a cell that reads fine off-load and collapses under it, give exactly the symptoms of a dead machine.
2. The fuse. Many of these machines have one right behind the socket — it is the part designed to die. Test it in continuity, out of circuit. A fuse that blows again is a short, not a fuse problem.
3. Capacitors. On most machines of this age this is the default suspect rather than a last resort — leaking SMD electrolytics eat the tracks underneath before they give any other sign. ⚠️ Not all of them are like that: some carry very few and are not recapped on principle. Read what this page says about it before reaching for the iron. → Recap
4. The cartridge connector. Cartridge contacts with isopropyl alcohol, never an abrasive eraser: it takes the gold plating off and the problem comes back worse. On the machine side, inspect the slot pins — splayed, bent or oxidised — and check continuity between slot and board.
5. The screen. Lines, a dead half, a picture that fades: it is almost always the ribbon and its solder joints, not the panel. Reseat before you order anything. If this machine has a TV output — not all of them do — test that too: it tells the screen apart from what feeds it.
6. Still nothing. Now, and only now, the logic: rails on the board, reset, clock, bus. → PCB diagnosis
Popular mods — what to buy, how
- Flashcart: R4 & derivatives (DS/DS Lite, slot-1) or a preservation flashcart → homebrew and library on microSD, plug-and-play 🟢.
- DSi softmod: Unlaunch (via a DSi SD card + exploit) unlocks homebrew with no hardware — 0 soldering 🟢. Make a NAND backup first.
- Screen / shell (DS Lite especially): replacement IPS panels, new shells, flex cables; a common repair = broken hinge / top flex. Install 🟠 (full teardown, fragile ribbons).
- Battery: fresh Li-ion cell (original DS units are ~20 years old); stylus/screen contacts and connectors.
Photos / assets
(To add: DS Lite, screens, board.)
Advanced repair
Hinge / screen ribbon (breakage), card reader, touch screen. Methods: PCB fault-finding · Traces & vias · Recap.
Archived manufacturer documentation ✅
Manufacturer documentation archived locally. ⚠️ These are owner's and reference manuals, not service manuals: they give the specifications, the connectors and the expected behaviour, but not the schematics or troubleshooting voltages.
- Nintendo DS — PDF
Status
Manufacturer documents with no explicit licence, kept for preservation (machines out of production for decades).
Sources & attribution
- Wikipedia — Nintendo DS — CC-BY-SA — https://en.wikipedia.org/wiki/Nintendo_DS
Image:
-
ds-board.jpg— Evan-Amos, public domain — https://commons.wikimedia.org/wiki/File:Nintendo-DS-Lite-Motherboard-Top.jpg

Review & corrections
How this space is used
Spotted a wrong value, an outdated procedure, a chip reference that does not match your board? Say so here, with what you observed (model, board revision, serial number, measurement). Every report is cross-checked against a source before anything changes — an unverifiable correction is published as “reported by …, not cross-checked” rather than silently applied.
Reading is open to everyone; posting requires signing in with Discord. Reports from the wiki's declared reviewers are handled first; anyone else's are read too, but go through a human before anything is changed.